How to use color filters:
There are two tools that can be used to change the overall color/hue of your image. The first one is using the Hue/Saturation tool, which I touched on in the black and white tutorial. The other tool that can be used is the photo filter tool, which has a more subtle effect.
Hue/Saturation:
1. First open your image in Photoshop.
2. Then crate a Hue/Saturation adjustment layer from the Adjustments Panel.
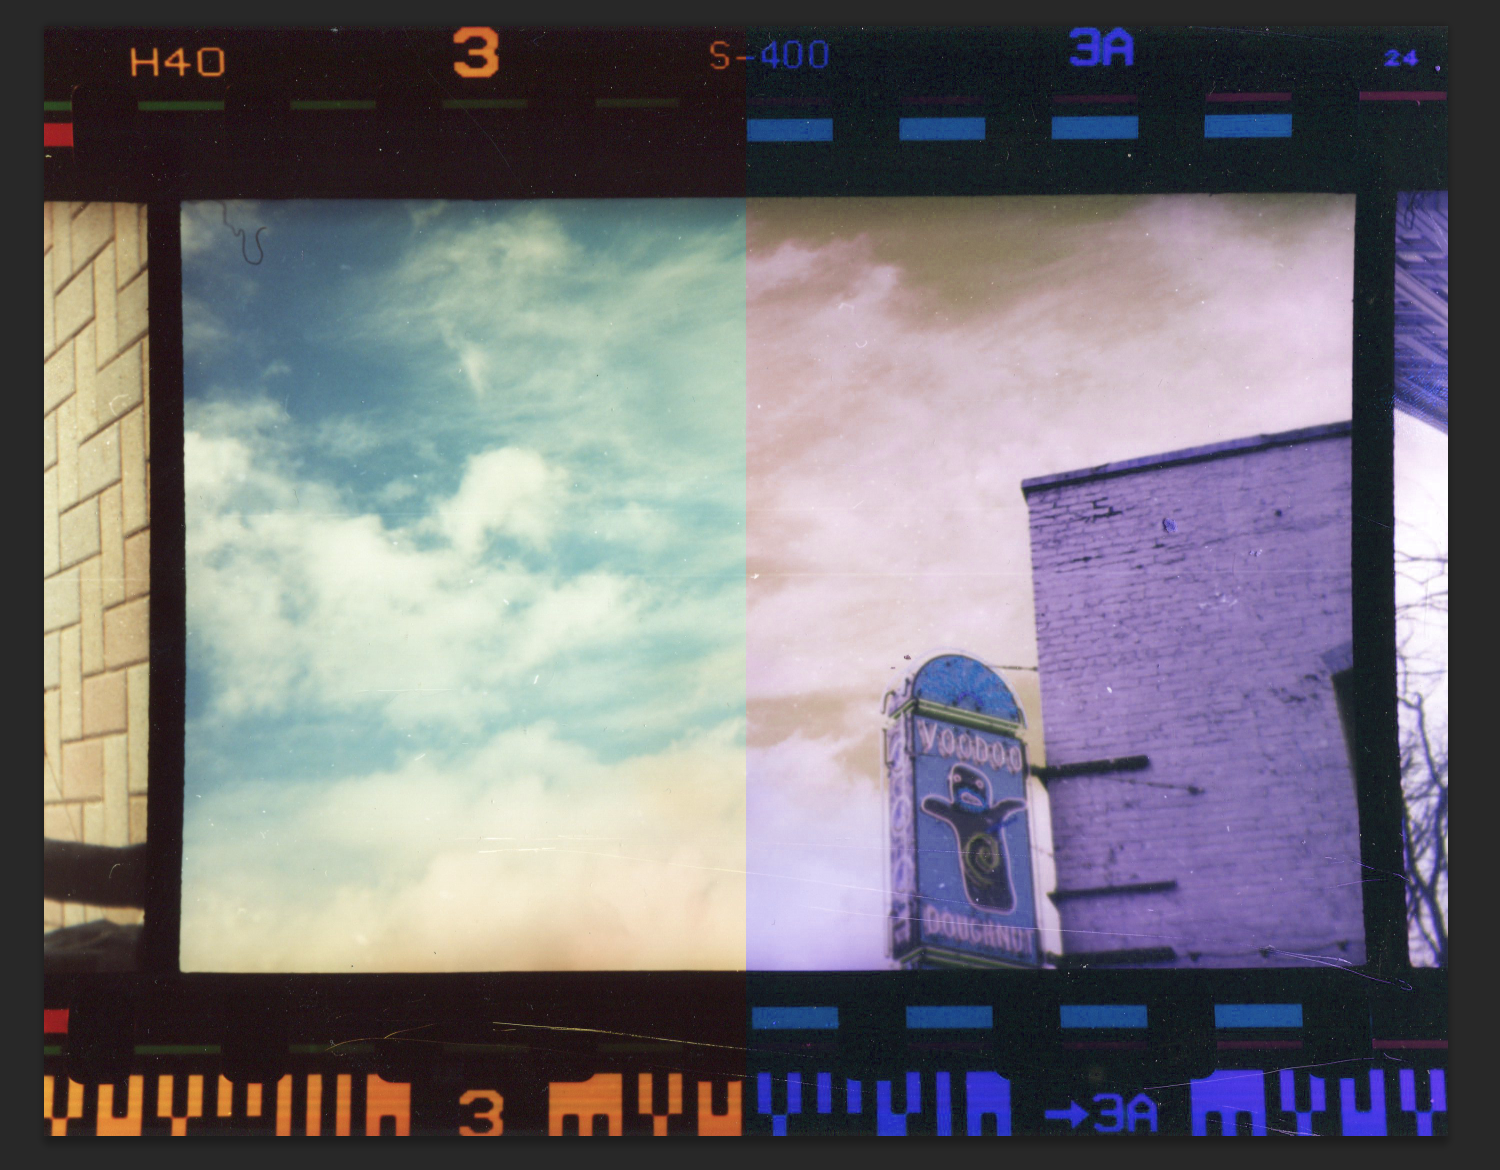
3. Now, instead of playing with the saturation slider, move the top slider to affect the overall hue of your image. Keep in mind that just because you are on the red part of the slider doesn’t mean your photo will turn red. It is adding orange in combination with the colors that are already in the photo. That is why, in this example, my image is mostly purple and not orange.
4. I don't find this filter particularly useful for an entire image. However, if we use a mask it can be helpful for changing the color of one object in the picture.
Here are my final results for both changing the hue of the entire picture, as well as using a mask to only affect the sign.


Photo Filter:
1. First, open the image you want to work with in Photoshop.
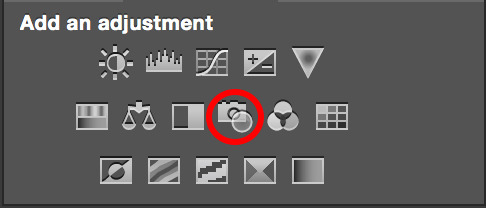
2. Then create a Photo Filter Adjustment Layer by clicking the camera icon in the Adjustments Panel.
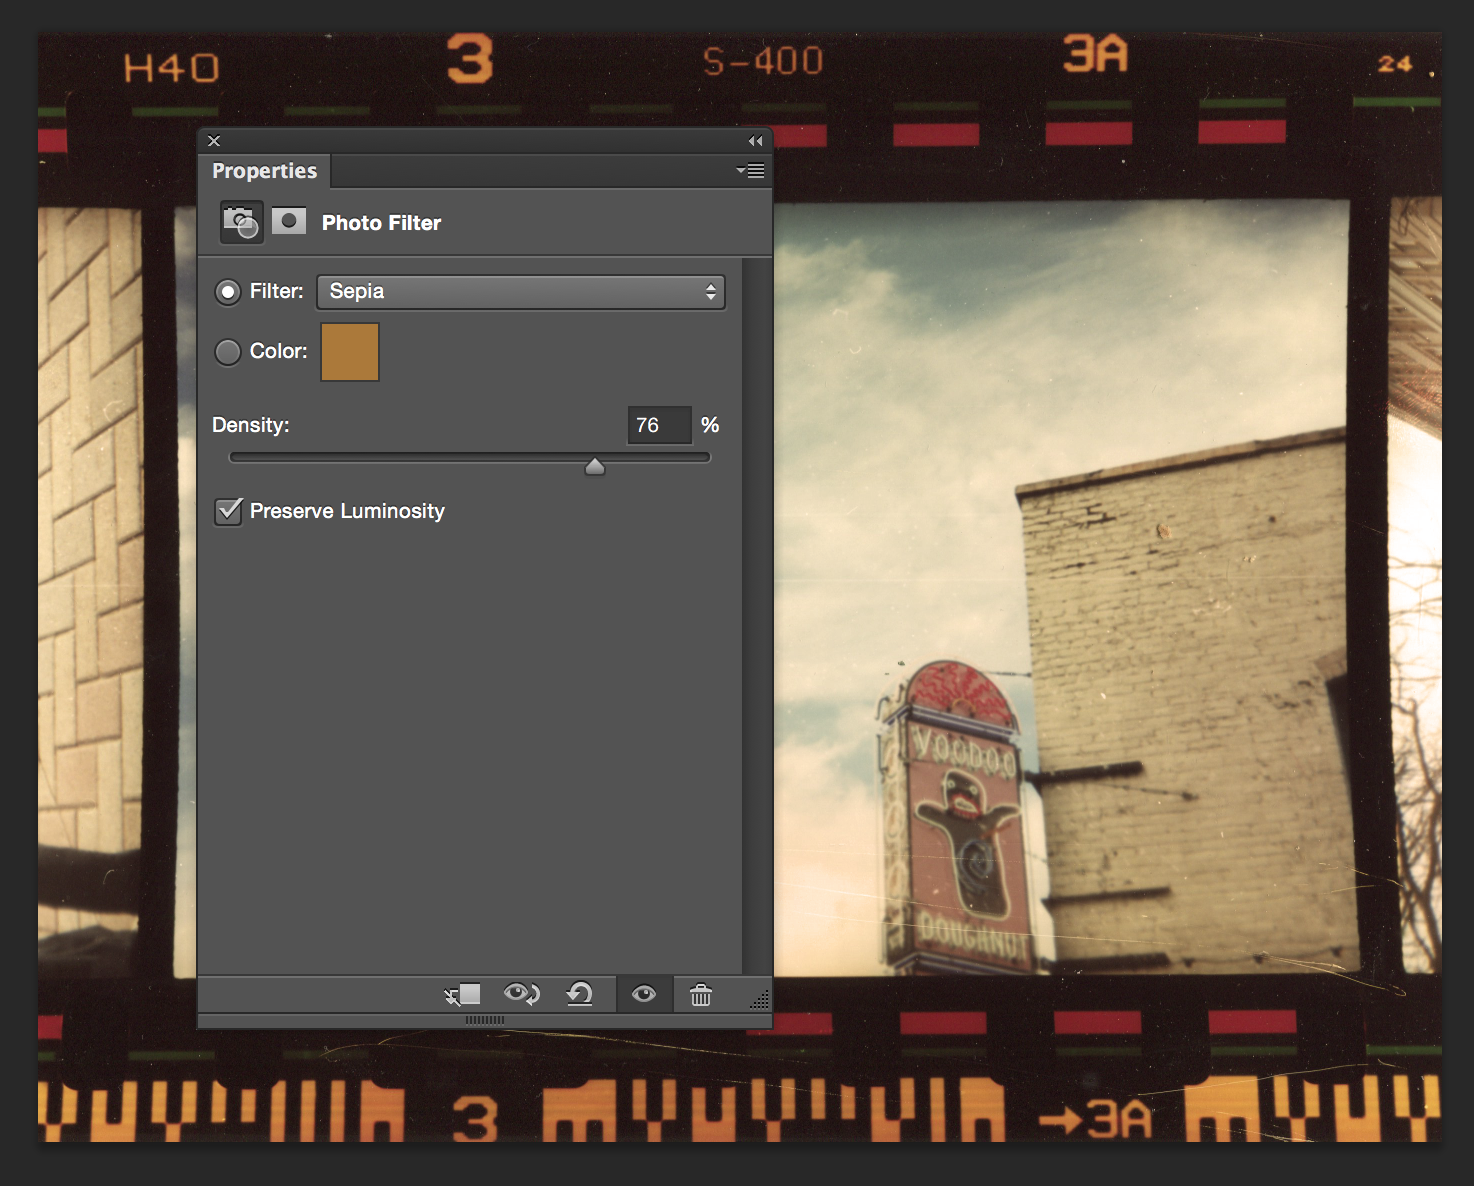
3. A box will appear asking you what kind of filter you want to apply. There are a lot of presets that you can toggle through, but you can also select a custom color.
4. Once you pick a color, in this example I’m using sepia, you want to move the slider to see how intense you want the color to be. You can range from a minimal tint to almost a full hue change. Usually somewhere in the 50% range is what I aim for, but it just depends on how intense you would like the effect to be.
Here is my final result. As I stated before, I like this option because it is more subtle. There are not many instances where I want to offset the colors completely. It is more likely that I want to just warm up or cool down the picture.

Hue/Saturation:
Step 1:
Step 2:

Final:

Final 2:

Photo Filter:
Step 1 :
Step 2:

Final:
