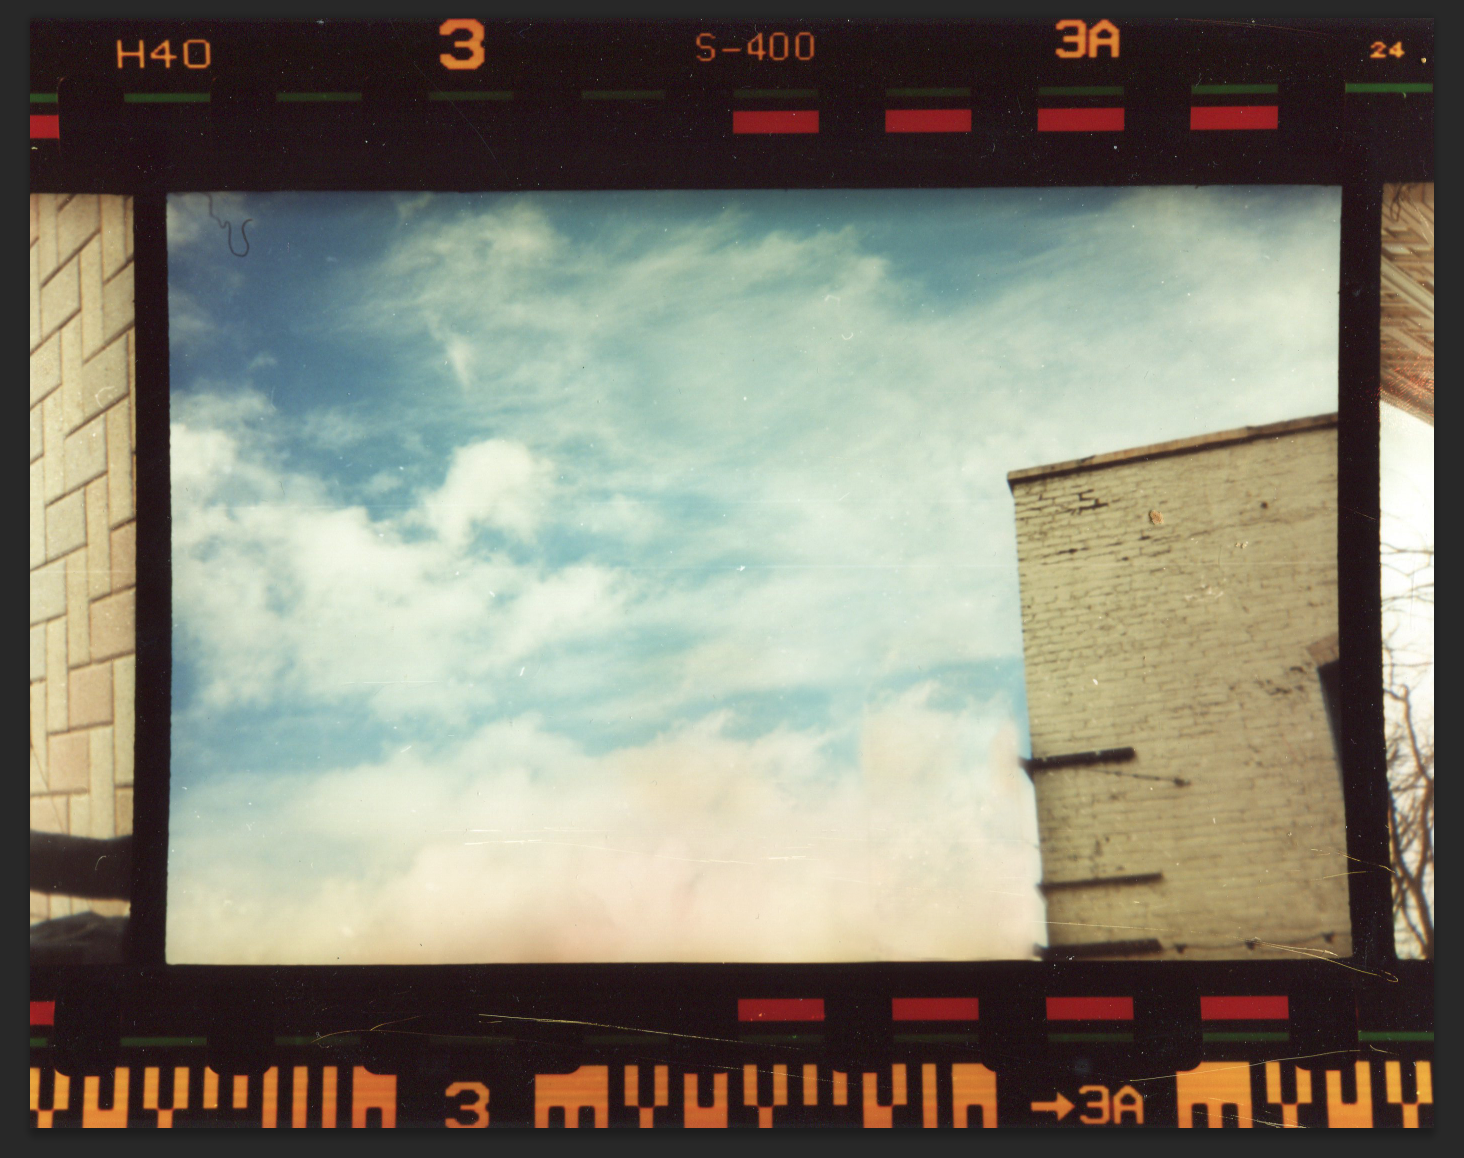
How to edit something out of a picture (clone tool/patch tool/content-aware move tool):
This tutorial shows you how to use a combination of 3 different tools, the Clone Tool, Patch Tool, and Content-Aware Move Tool, to edit an object out of a photograph, and reblend the background to make it seem natural and realistic.
Note the Content Aware Tool is new to Photoshop CS6 and Photoshop CC
1. After you open your image in Photoshop, you will want to duplicate your original layer. The Clone Tool, Patch Tool, and Content-Aware Move Tool, are all destructive. Meaning they will make permanent changes to the layer you are working on.
2. The Patch Tool and Content-Aware move tool will help you get rid of the object you are trying to edit out. They both operate in the same way. They take a section that you select and then copy and tempt to blend it onto the section you move it to.
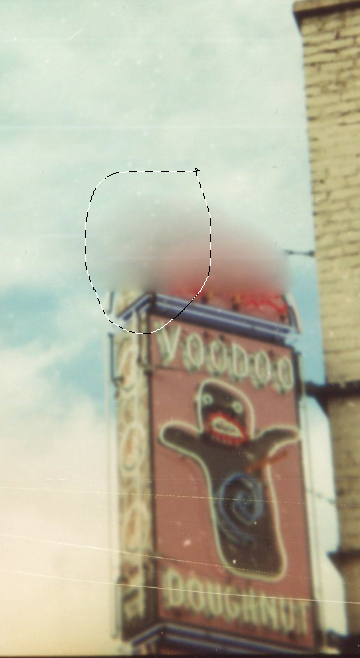
3. The Patch Tool will help generally blend things. Although, if there is a large variance in color or texture it will just turn into a blobby mess. Like this:
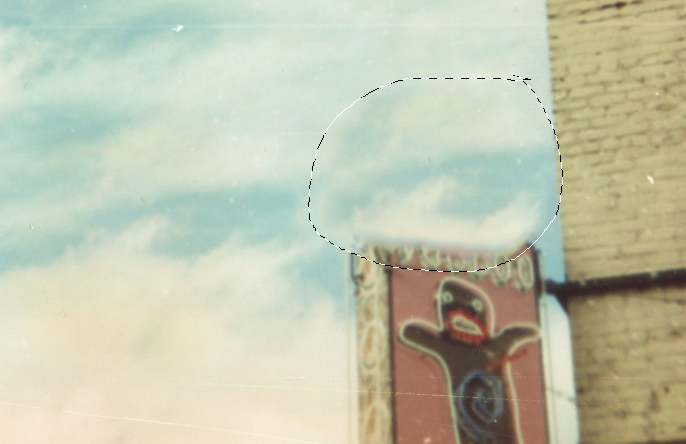
4. The Content-Aware Move Tool will do more of a cloning approach, but will attempt to blend the edges with the new background. Like this:
5. When using either tool make sure to check the options/settings. With the Patch Tool you can make your selection be the source or destination. I typically use destination so I can carefully select the part I want to change rather than trying to drag something else onto it. When using the Content-Aware Move Tool there is the option to move or extend your selection. I always choose extend. This makes it work in the same way the patch tool does.
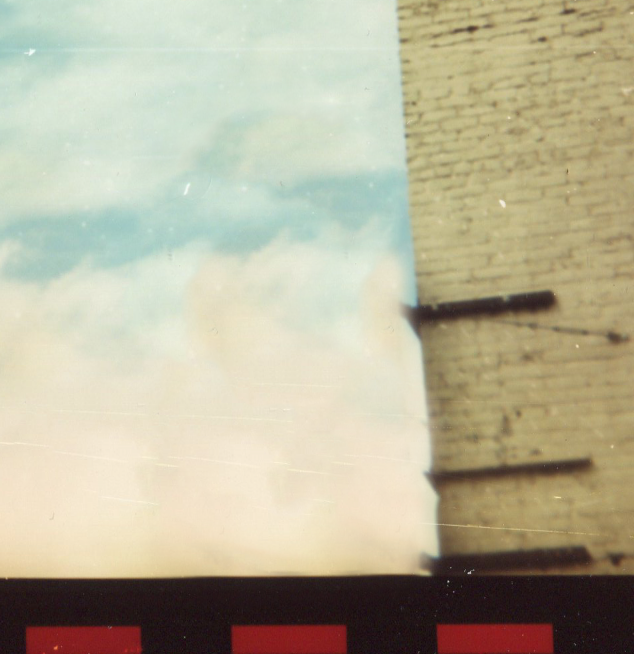
6. From here I just cover the entire area that I want edited out one piece/selection at a time. This will result in something like this:
7. From here we want to blend the area so it looks more natural. For this portion I use the Clone Stamp Tool and the Patch Tool.
8. The Clone Stamp tool will literally clone any part of the picture and let you paint it onto another portion of the picture. The downside to this is that it does not automatically blend the edges. This is why I use it as the second step.
9. When using the Clone Stamp Tool, I almost always have the opacity turned down between 30%-80% depending on how much I want to blend. Less is more, and layering will give a more natural look in most cases. I also turn the hardness of the brush to 0% so the edges are not harsh. To use this tool you must select an area as the source. Hold down the Alt/Option key and your mouse will turn into a target like pointer. Then click where you want to clone from. The Clone Stamp Tool is particularly useful when trying to follow straight edges or lines. You can preview what you are cloning when you are hovering over your destination area.
10. The Patch Tool can be used the same as before, but now that the area is roughly the same texture it will just help blend any odd coloring or shapes.
Here is my final result:

2. The Patch Tool and Content-Aware move tool will help you get rid of the object you are trying to edit out. They both operate in the same way. They take a section that you select and then copy and tempt to blend it onto the section you move it to.
3. The Patch Tool will help generally blend things. Although, if there is a large variance in color or texture it will just turn into a blobby mess. Like this:

4. The Content-Aware Move Tool will do more of a cloning approach, but will attempt to blend the edges with the new background. Like this:

5. When using either tool make sure to check the options/settings. With the Patch Tool you can make your selection be the source or destination. I typically use destination so I can carefully select the part I want to change rather than trying to drag something else onto it. When using the Content-Aware Move Tool there is the option to move or extend your selection. I always choose extend. This makes it work in the same way the patch tool does.
6. From here I just cover the entire area that I want edited out one piece/selection at a time. This will result in something like this:

7. From here we want to blend the area so it looks more natural. For this portion I use the Clone Stamp Tool and the Patch Tool.
8. The Clone Stamp tool will literally clone any part of the picture and let you paint it onto another portion of the picture. The downside to this is that it does not automatically blend the edges. This is why I use it as the second step.
9. When using the Clone Stamp Tool, I almost always have the opacity turned down between 30%-80% depending on how much I want to blend. Less is more, and layering will give a more natural look in most cases. I also turn the hardness of the brush to 0% so the edges are not harsh. To use this tool you must select an area as the source. Hold down the Alt/Option key and your mouse will turn into a target like pointer. Then click where you want to clone from. The Clone Stamp Tool is particularly useful when trying to follow straight edges or lines. You can preview what you are cloning when you are hovering over your destination area.
10. The Patch Tool can be used the same as before, but now that the area is roughly the same texture it will just help blend any odd coloring or shapes.
Here is my final result:

Patch Tool
Step 1:

Content-Aware Tool
Step 2:

Step 3:

Clone Stamp
Step 4:
Final:
